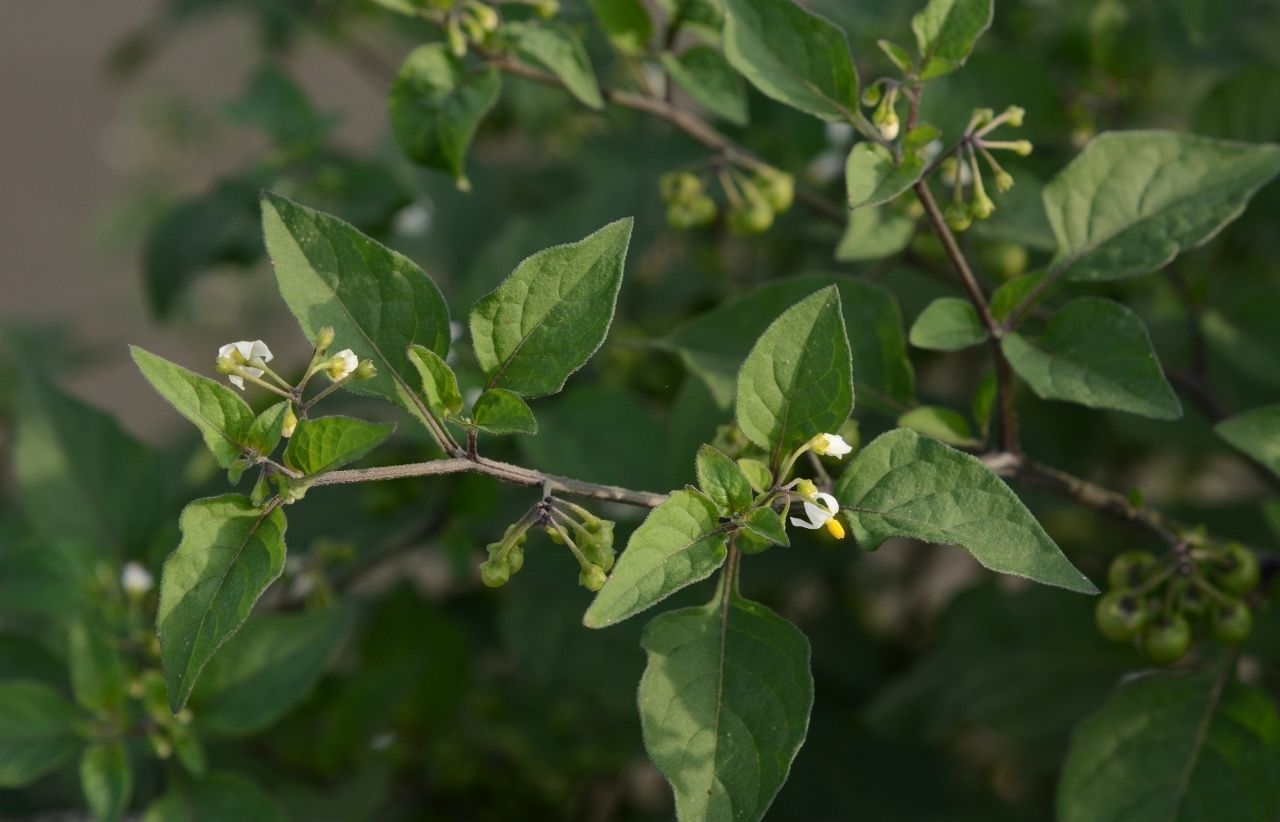
How To Grow African Nightshade (Managu)
The African nightshade / black nightshade, commonly referred to Kenya as Managu, is grown as an edible vegetable in Kenya. It is cherished for its nutritious benefits and has been used in traditional African medicine over the ages. The term “Nightshade” refers collectively to a wide ranging group of plants including poisonous, medicinal and edible species (from the genus Solanum) • There are several species with black berries, but the most popular ones are those with orange berries belonging to “Solanum Villos.
Some Solanum varieties are preferred for their bitter taste while others are considered sweet/tastier, particularly after being boiled and the water discarded
VARIETIES
| Solanum Villosum-the hairy nightshade, red nightshade or wooly nightshade.This variety has medium-sized leaves and is liked in most parts of the rift valley even though it can grow in any part of Kenya. It also produces orange-colored fruits which are edible. | Solanum Americanum-American black nightshade, small-flowered nightshade or glossy nightshade is a herbaceous flowering plant of wide. It’s broad-leafed with purple seeds and less bitter taste than the narrow-leafed. Does very well in most parts of Kenya with a wider market. Both have the same nutritional value. |
| solanum scabrum-it has a bigger garden huckleberry than americanum, is an annual or perennial plant in the nightshade family. It has more bigger fruit than americanium |
Sowing Method:
Sowing Depth and spacing: Plant the seeds in the already prepared rows of 30 cm apart, with the spacing between the plants being 15cm
Altitude: 0 – 2,400 metres above sea level
Rainfall: 500 – 1,200 mm of rainfall Growing
Temperature: Warm Temperatures
Soil Type: Well drained soils and High organic matter content
Soil PH: ranges between 5.5 to 7
Germination Period: Germination occurs after 7 to 14 days.
Transplanting Period:The African Nightshade seedlings will be ready for transplanting 30 days after seeding or when they have 5 to 6 true leaves and a height of between 10 to 15 centimeters.
Feeding:As Managu needs a lot of organic matter, manure or compost should be applied at the rate of 8 tonnes per acre, 2 weeks before transplanting. Ensure the manure is well incorporated into the soil.
Pollination:
Sun / Shade:
Water:You will need to water the nursery regularly, as the seeds need moisture to germinate. The young seedlings will also need watering so that they grow well. Apply mulch thinly on the nursery garden so as to conserve water. Remove the mulch after the seedlings emerge.
Amount of Days Before Harvest: Managu plants will be ready for harvest 30 days after transplanting for nursery raised ones and 60 days for the ones that were planted directly on to the farm.
Harvesting and Storage:
Complete uprooting – the whole African nightshade plant is uprooted and sold as a whole. This method is not common as the farmer will only have one harvest
Plucking Leaves – With this method, leaves are plucked from the plant on a weekly basis. This commences after 60 days of planting ( 30 days after transplanting ). This method is the most preferred as it gives the farmer continual produce for 3 to 4 months. Remove the flowers regularly to ensure the plant continues to produce more leaves, instead of focusing its resources on developing the fruits.
African nightshade fruits can be harvested for its seeds and also for value addition as Jam and dye. Managu leaves are harvested in the morning, to be taken to the market during the day. Alternatively, they can be harvested in the afternoon, stored in plastic bags or banana leaves, to keep them fresh and taken to the market the next day. Sorting is done to remove dried or yellowed leaves and insects from the African Nightshade harvest. Grading African Nightshade leaves is done according to the size of leaves, with same-sized leaves being bundled together.
Fresh Managu leaves can be washed, blanched, and dried. They can be dried and stored in plastic containers for future use.
Some of the major pests include
Root nematode is the deformation of the root system which inhibits the translocation of water and mineral salts thus resulting in stunted plant growth. It can be controlled by crops rotation and intensive use of manure.
Cutworms are grey to black caterpillars that feed at night, either bite out the side of the stem at a ground level causing the plant to fall over, or may cut it completely. It is controlled by hand removal since the pest is easily found near the damaged plant.
Flea Beetle feeds on leaves creating big holes in the foliage and is controlled by keeping the garden weeds free.
Aphids. Destructive on crops especially during dry seasons. They are pale green and often covered with a light dust of mealy powder; the results are curled and distorted leaves.
Common diseases
Bacterial bright is characterized by small, round, water-soaked spots, which eventually turn dark brown to black and become hard and dry.
Control
- Once the soil is affected, avoid planting night shade for a period of at least 4 years.
- Use disease free seeds
Early blight. Leaf spots of early blight are circular, up to 1 cm in diameter, brown, and often show a circular pattern which distinguishes this disease from other leaf spots
Control
- The disease has no cure but can be controlled using fungicides but observe the recommended post-harvest interval.
- Crop rotation with amaranth will help but not tomatoes, potato, or capsicum as they belong to the same family and are susceptible to the same diseases
- Remove infected leaves during the growing season, discard all badly infected plant debris at the end of each season
- Use certified disease-free seeds
- When using own seeds, treat with hot water